Set up product with multiple optionsUpdated 10 months ago
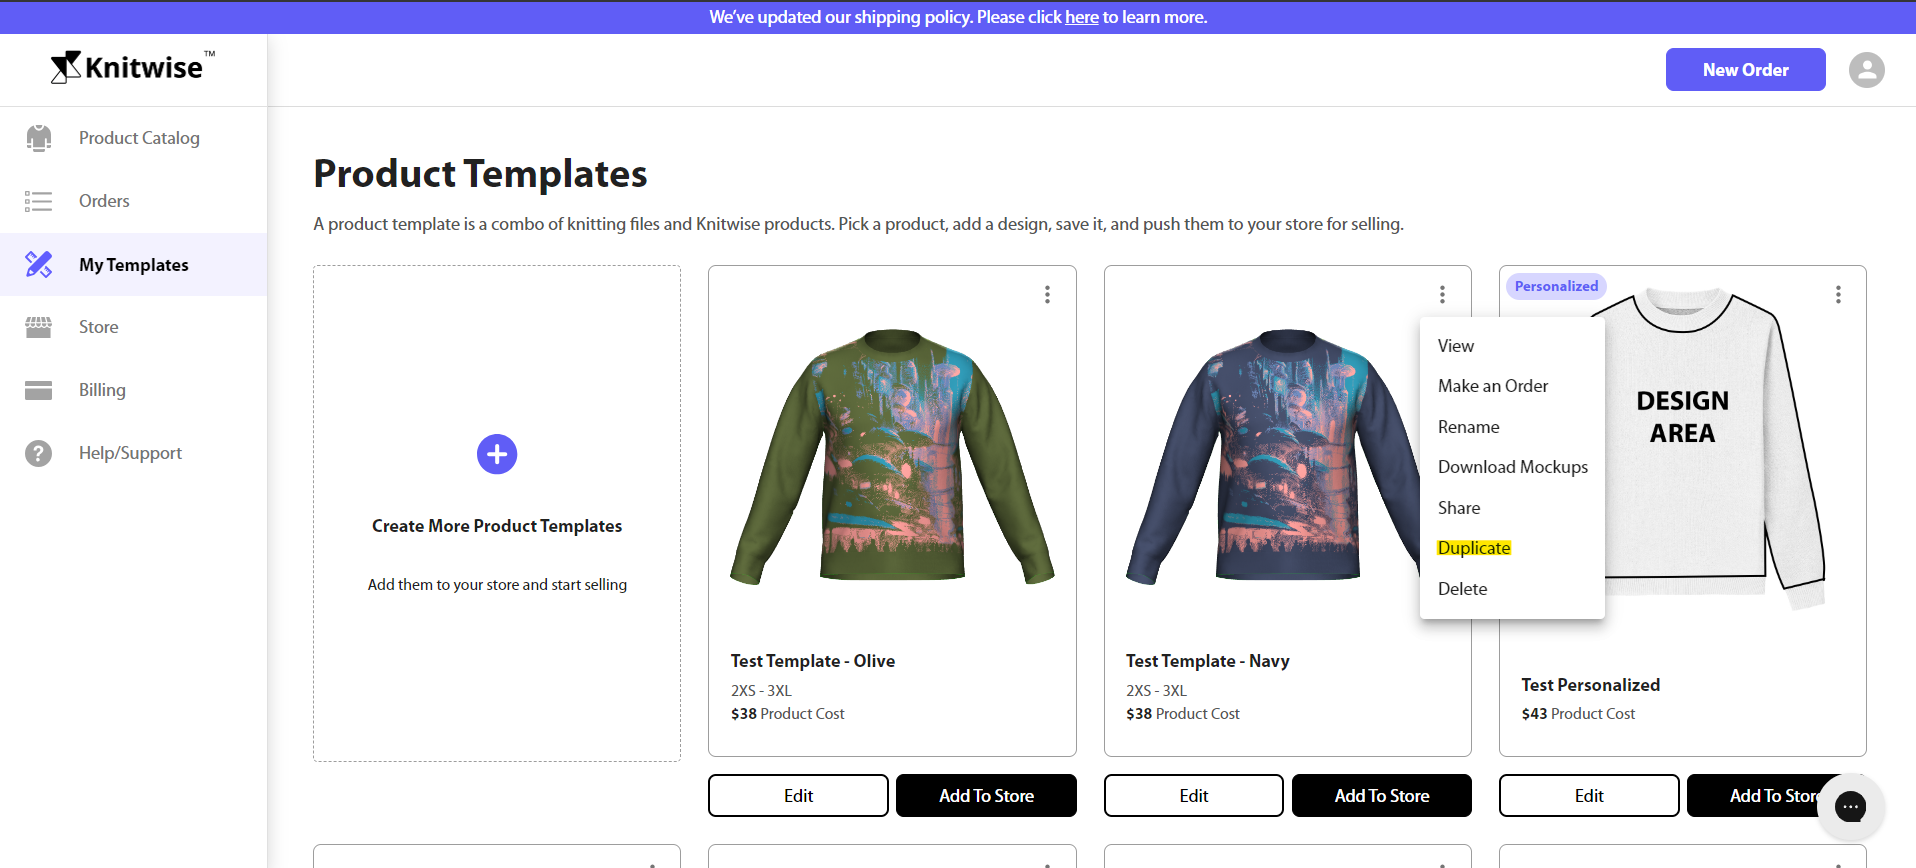
- Prepare your product templates. Use the "Duplicate" feature to create copies, then modify them as needed based on your requirements. For this tutorial, we will be working with two product templates: "Test Template - Olive" and "Test Template - Navy."
- Add your products to your store as you normally would (refer to the tutorial here). Below is a preview of our test store dashboard. You can keep the products in "Draft" status for now, as we will manually create a new Shopify product in the following steps.

- Identify the SKUs for each product in your store. In your Knitwise Dashboard, navigate to "Store," select your store, and locate the product template you added in step 2. Click on the product template and find the "Variants" section. Record the SKUs for each size (which begin with "kwts_") and note which store product they correspond to.
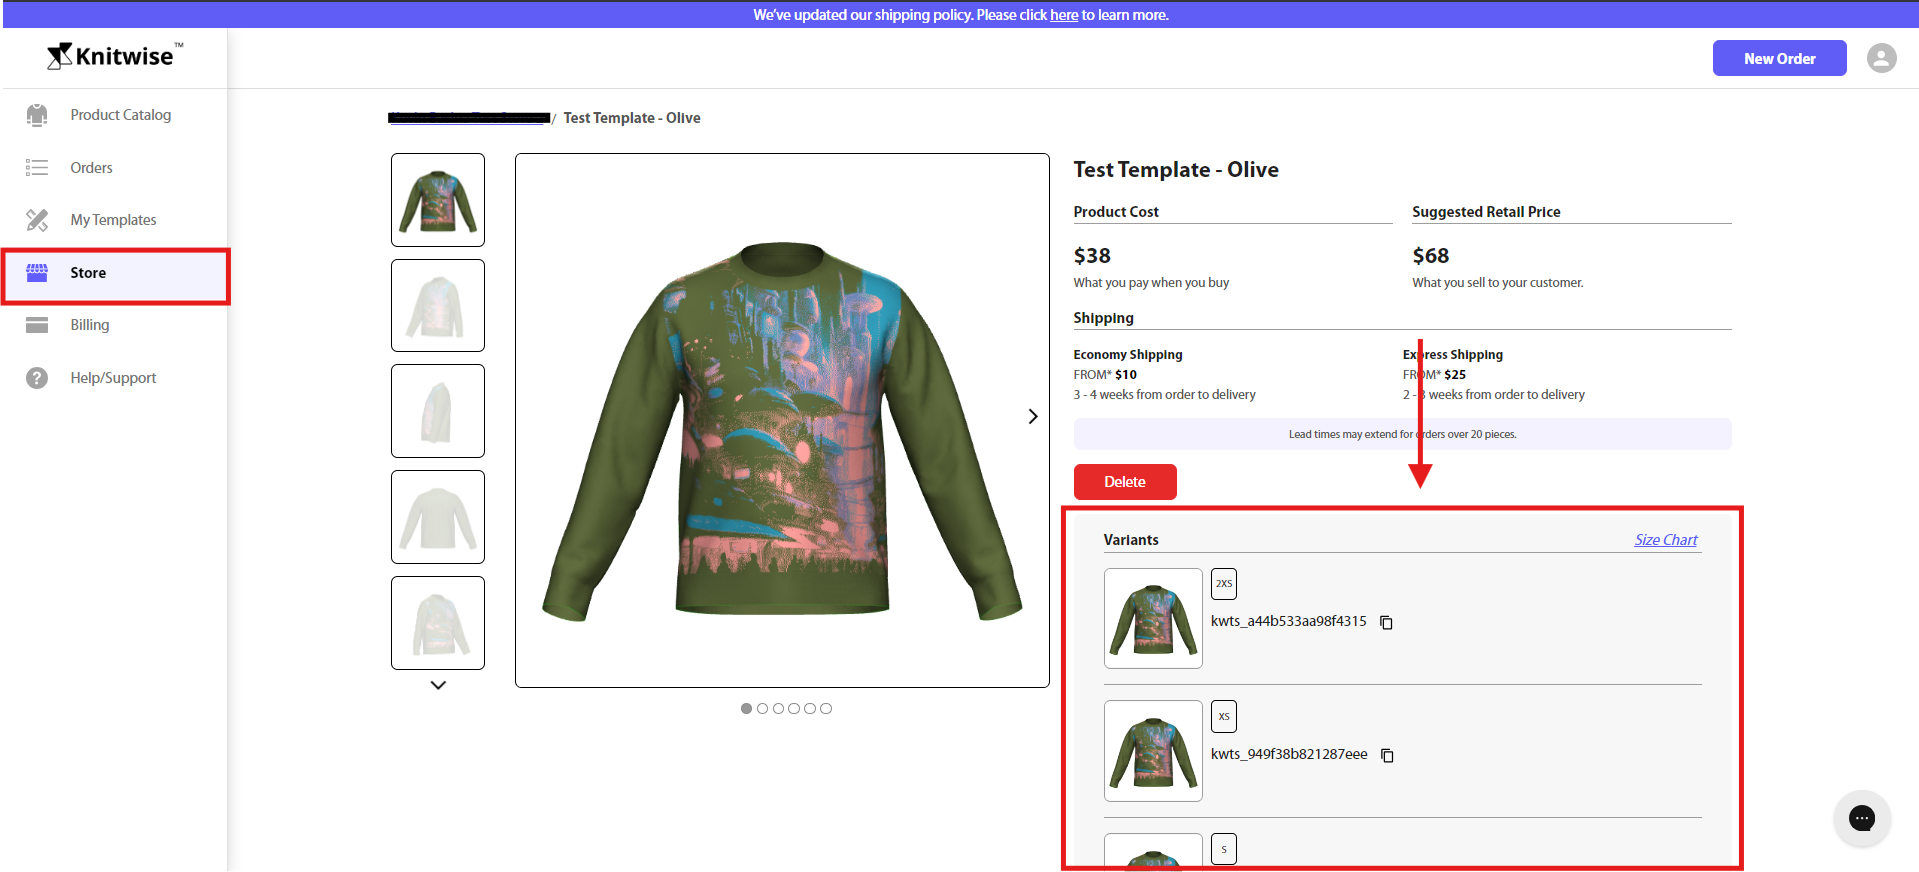
Upon reviewing the two test products added to the store, we have compiled the following list of SKUs: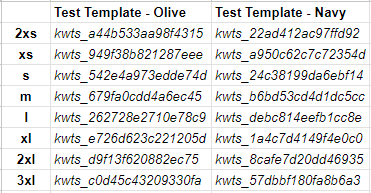
- Manually create a Shopify product (a single product) that will be displayed in your store. You may want to reuse the same mockup images from the two Shopify products added in step 2. For this example, we added "Size" and "Color" under the Variants section. Save the product, then proceed to the next step.
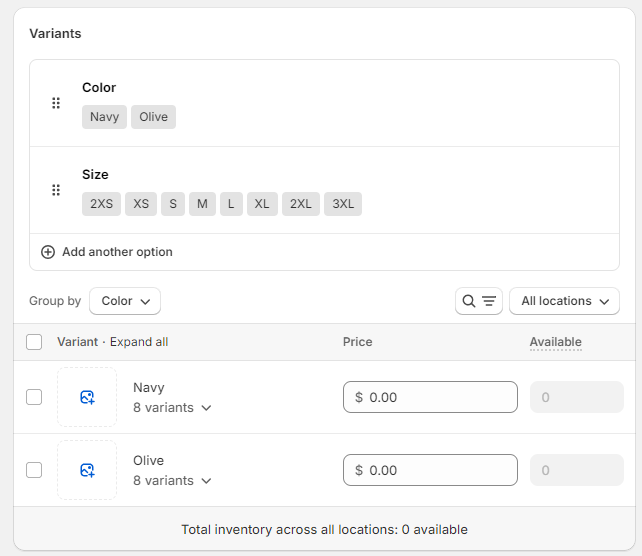
- Edit the product again, but this time, select a specific variant.
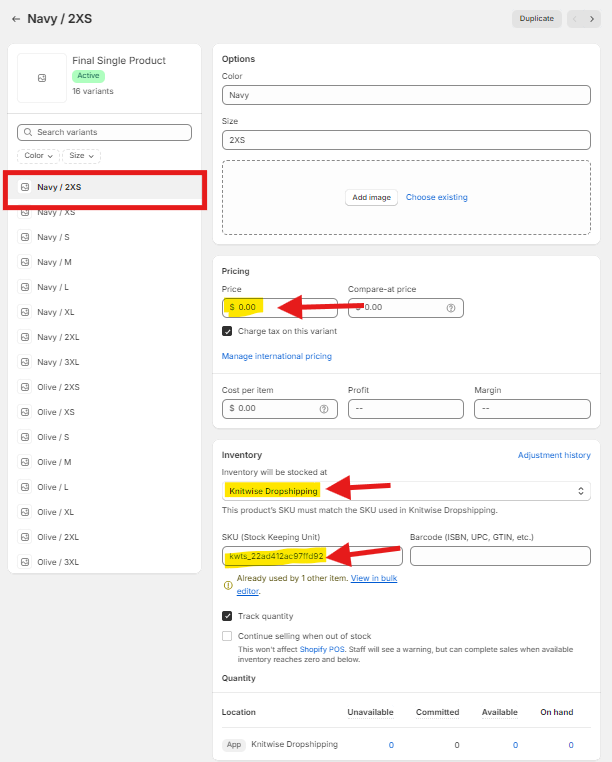
- In the Pricingsection:
- Use the same price as the products added in step 2.
- In the Inventorysection:
- Choose "Knitwise Dropshipping" as the location where the inventory will be stocked.
- Paste the SKU corresponding to the selected variant.
- In the Pricingsection:
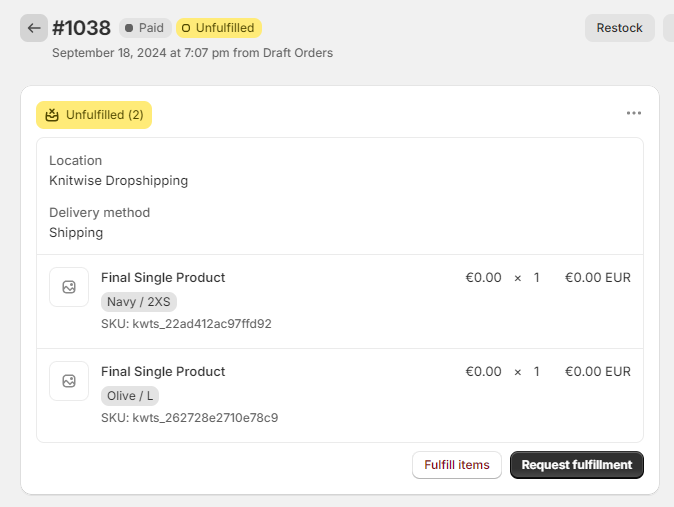
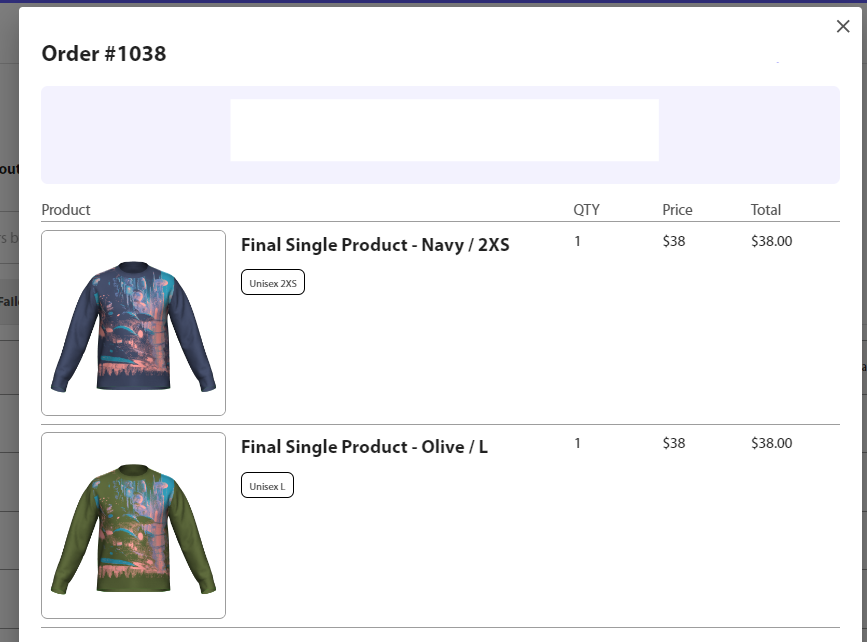
- Place a test order. Once completed, the order should appear under the Orders tab in your Knitwise Dashboard.
